Completing a route
This guide walks you through a full route — from opening it in the app to marking it complete.
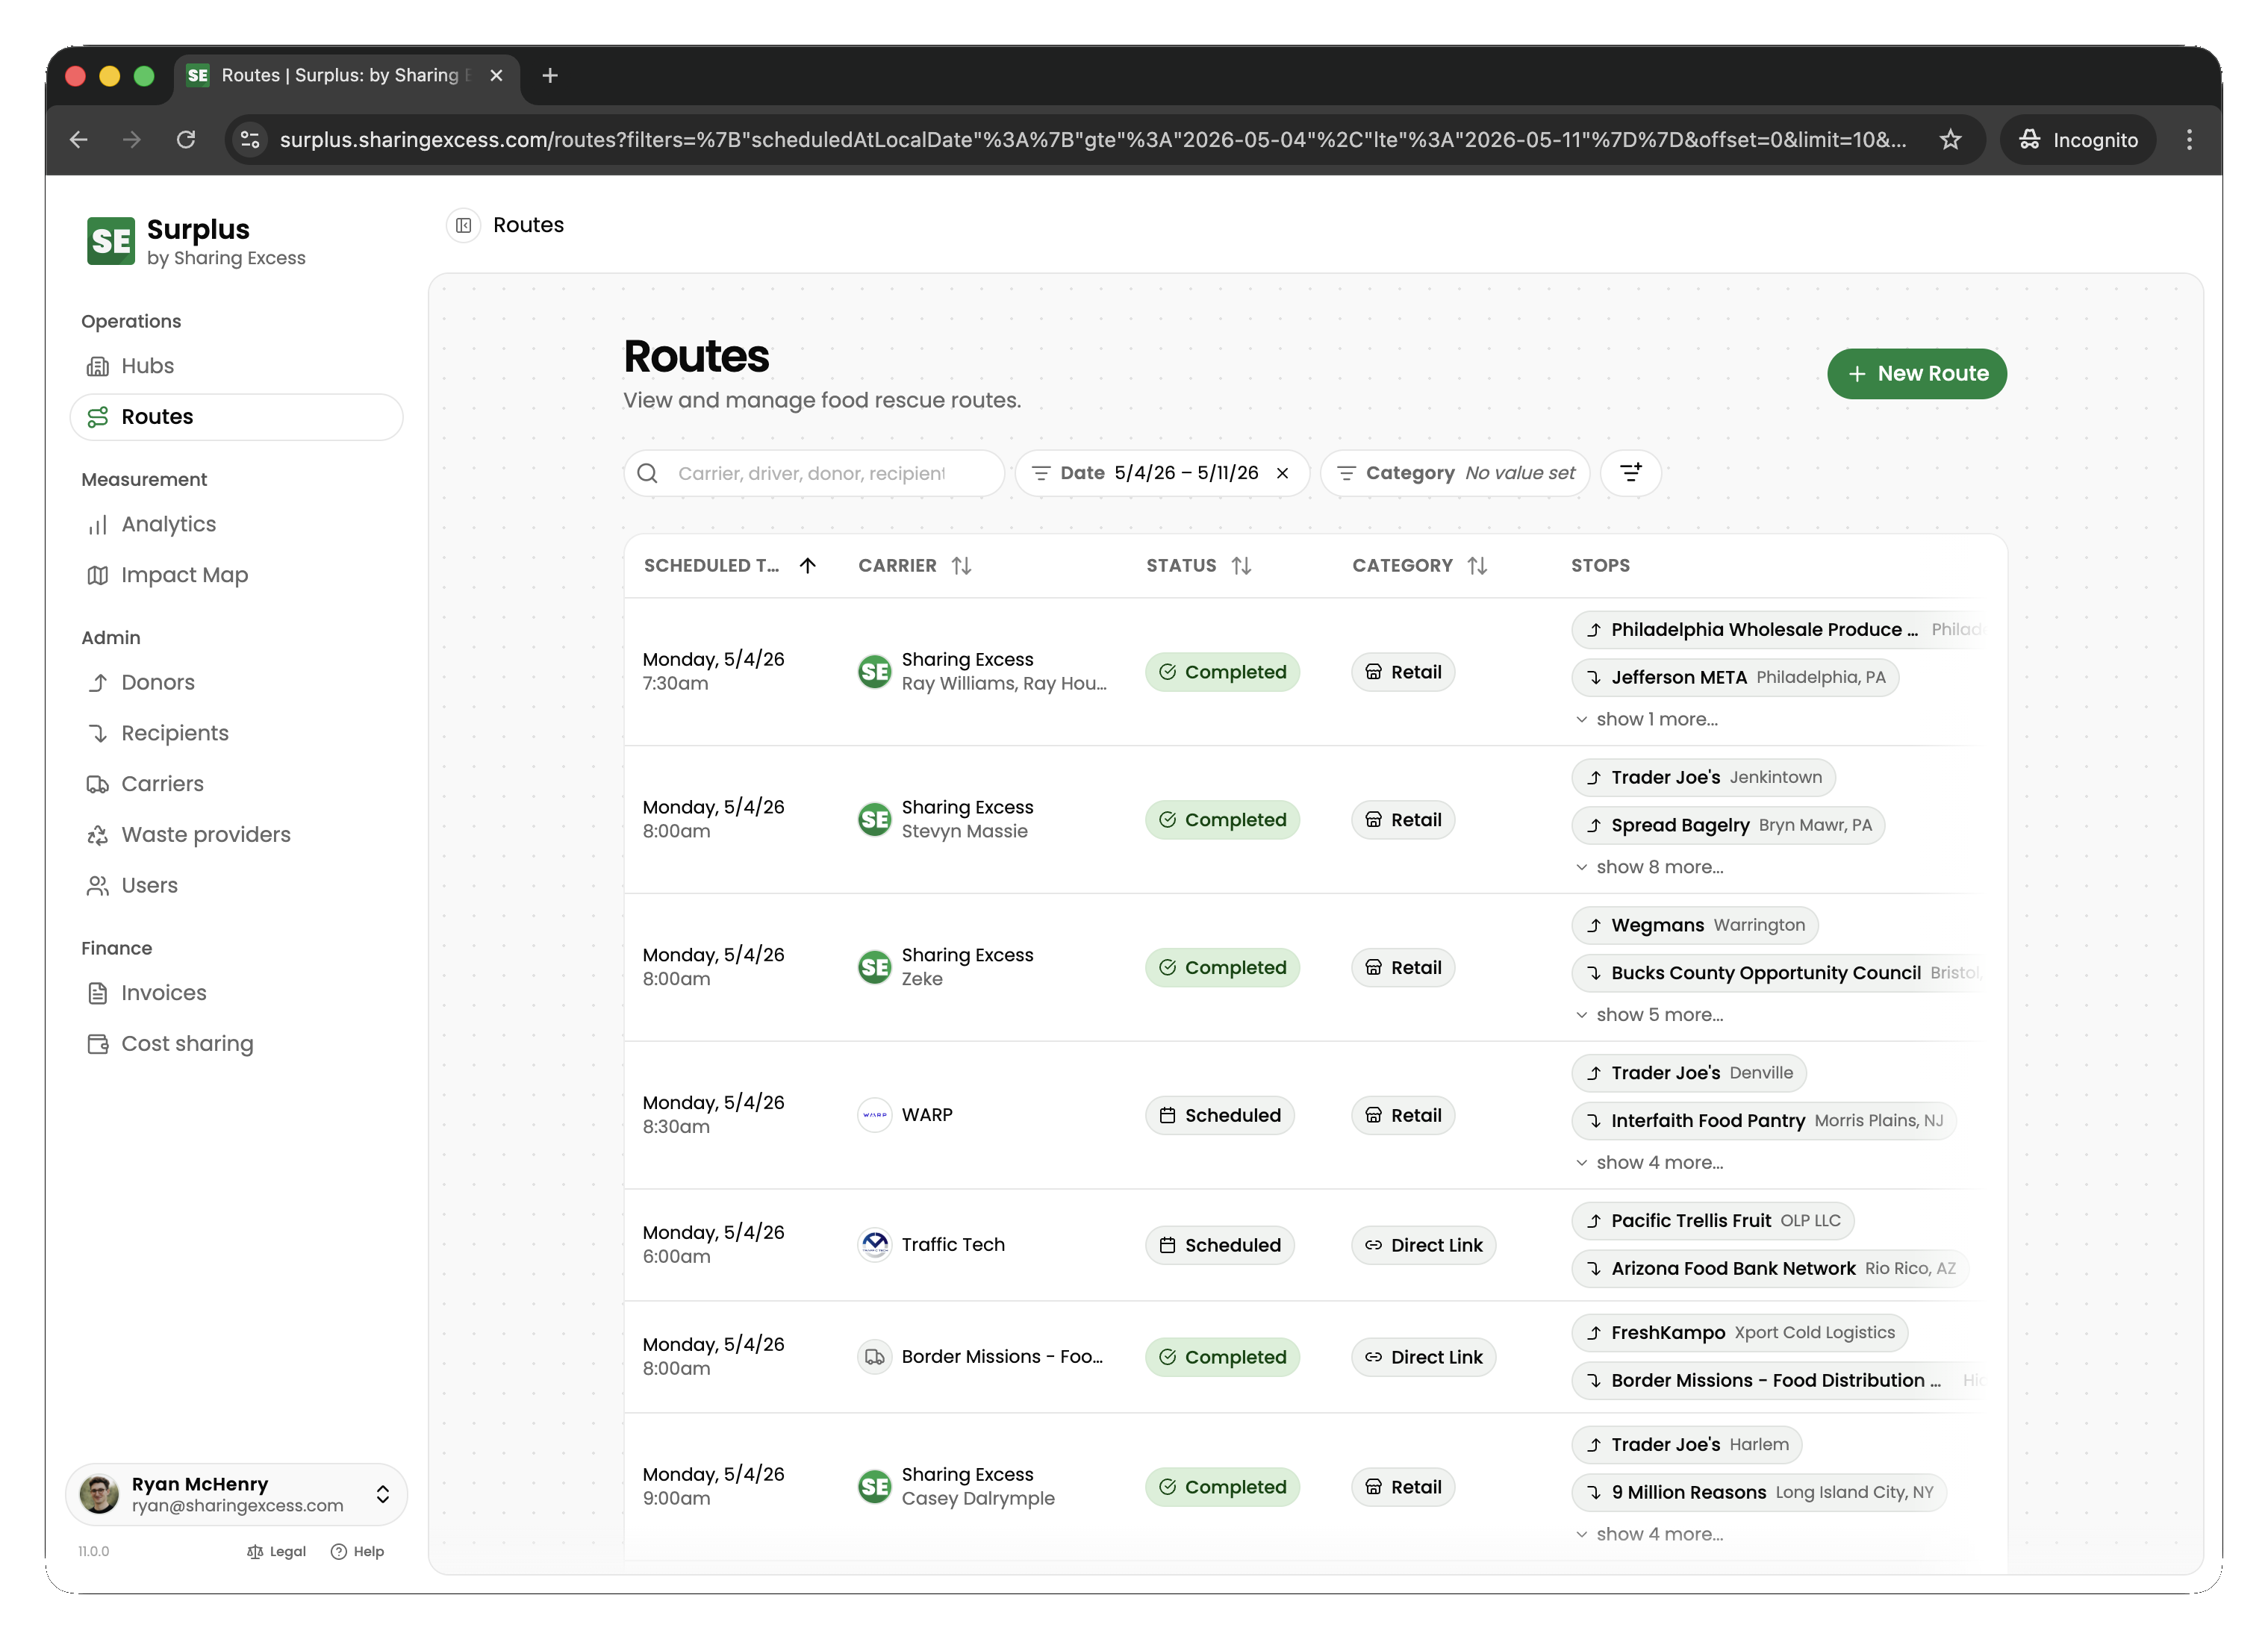
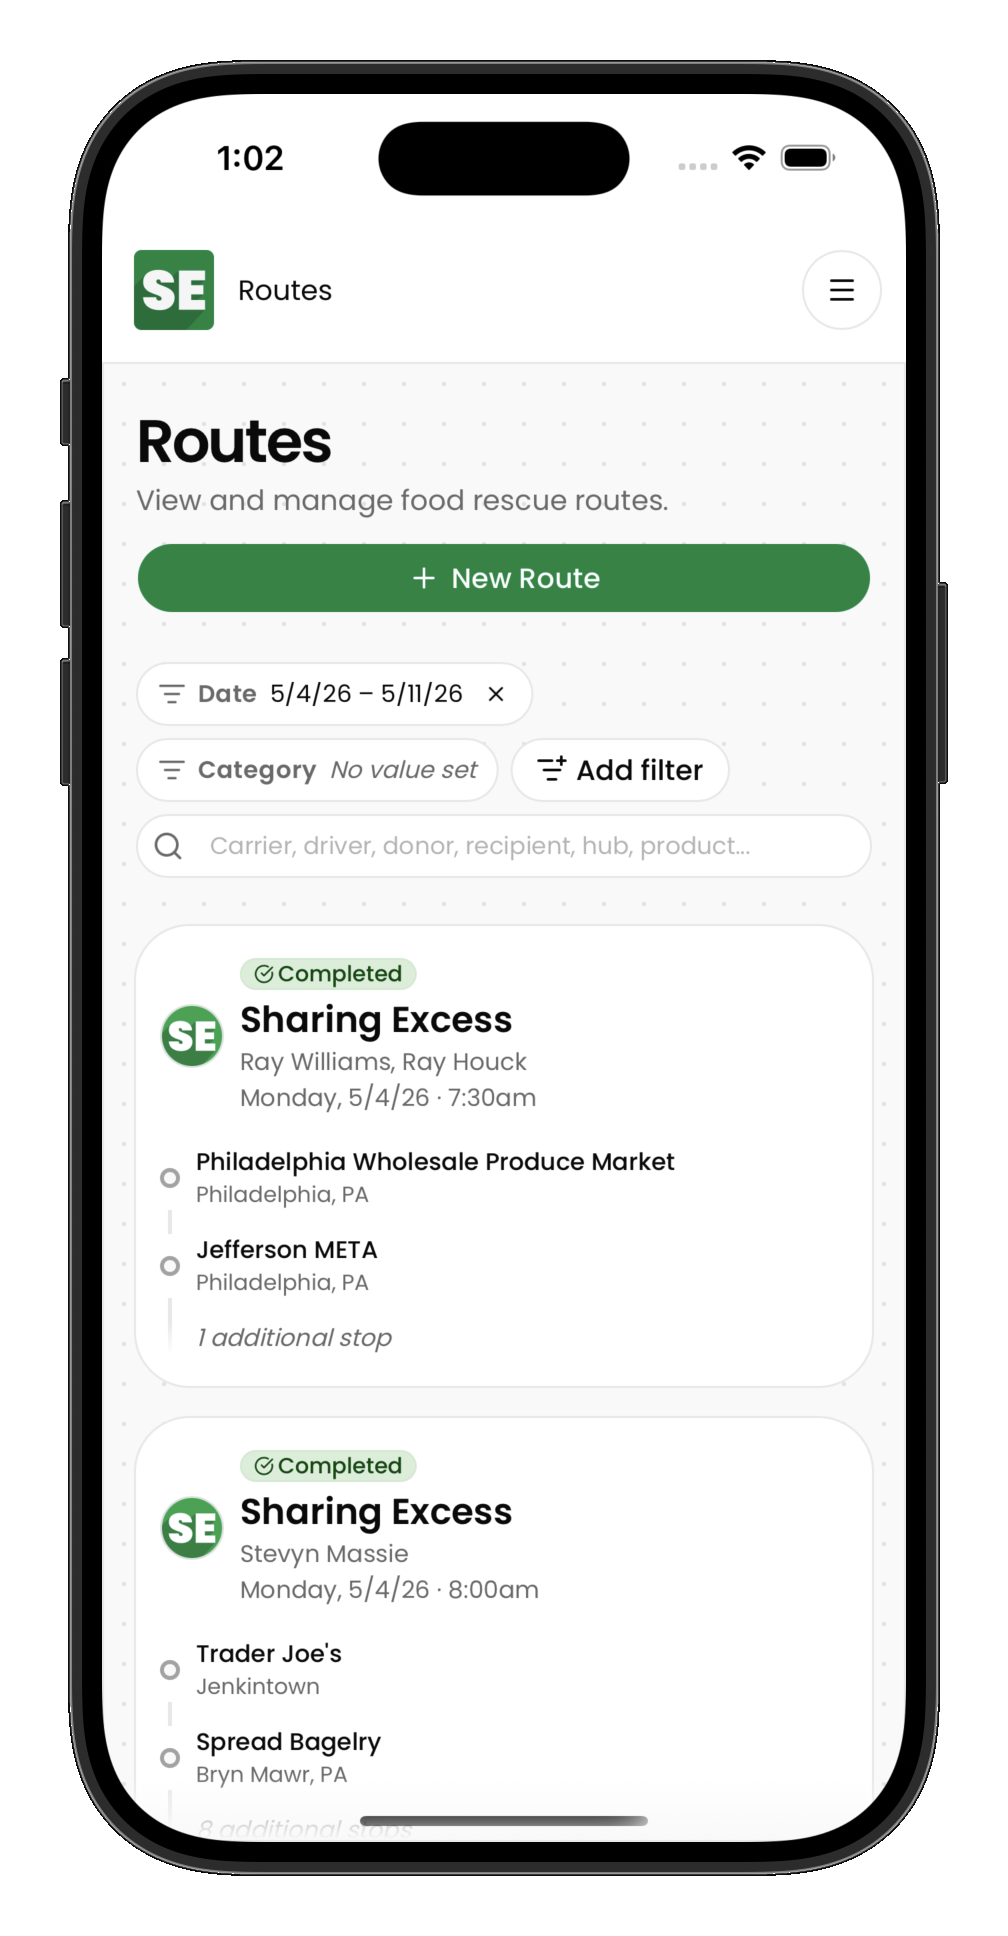
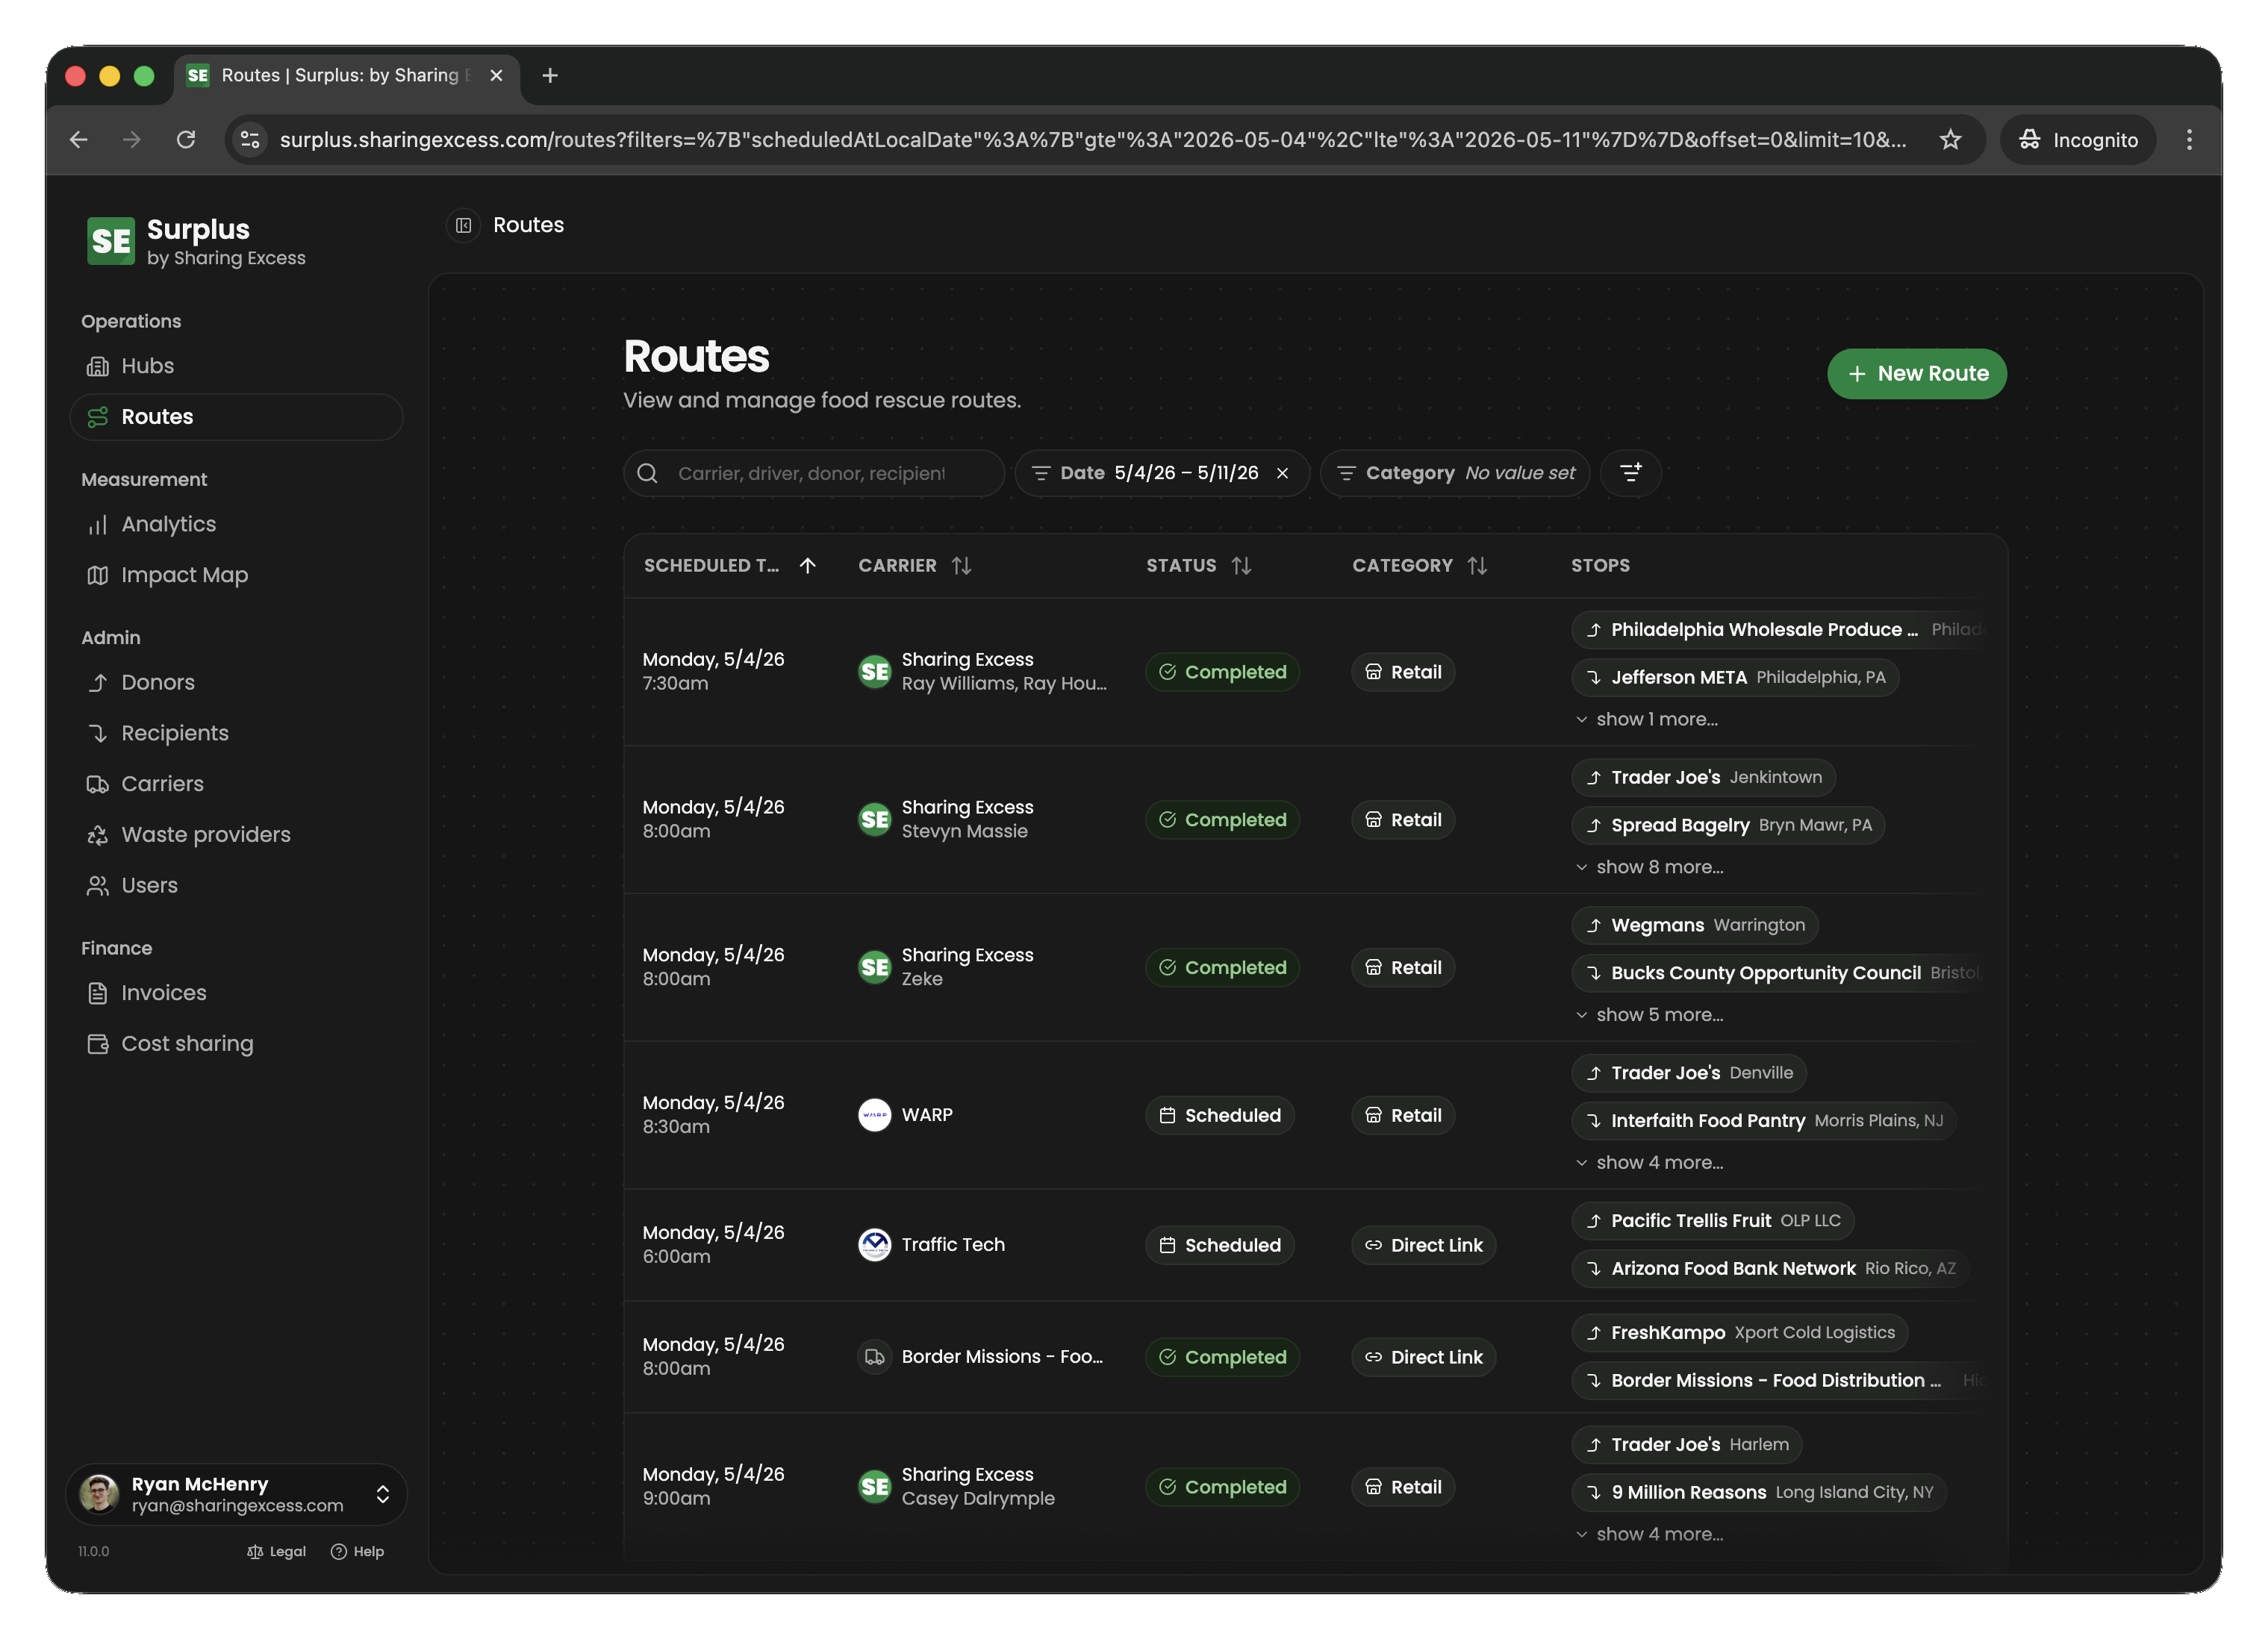
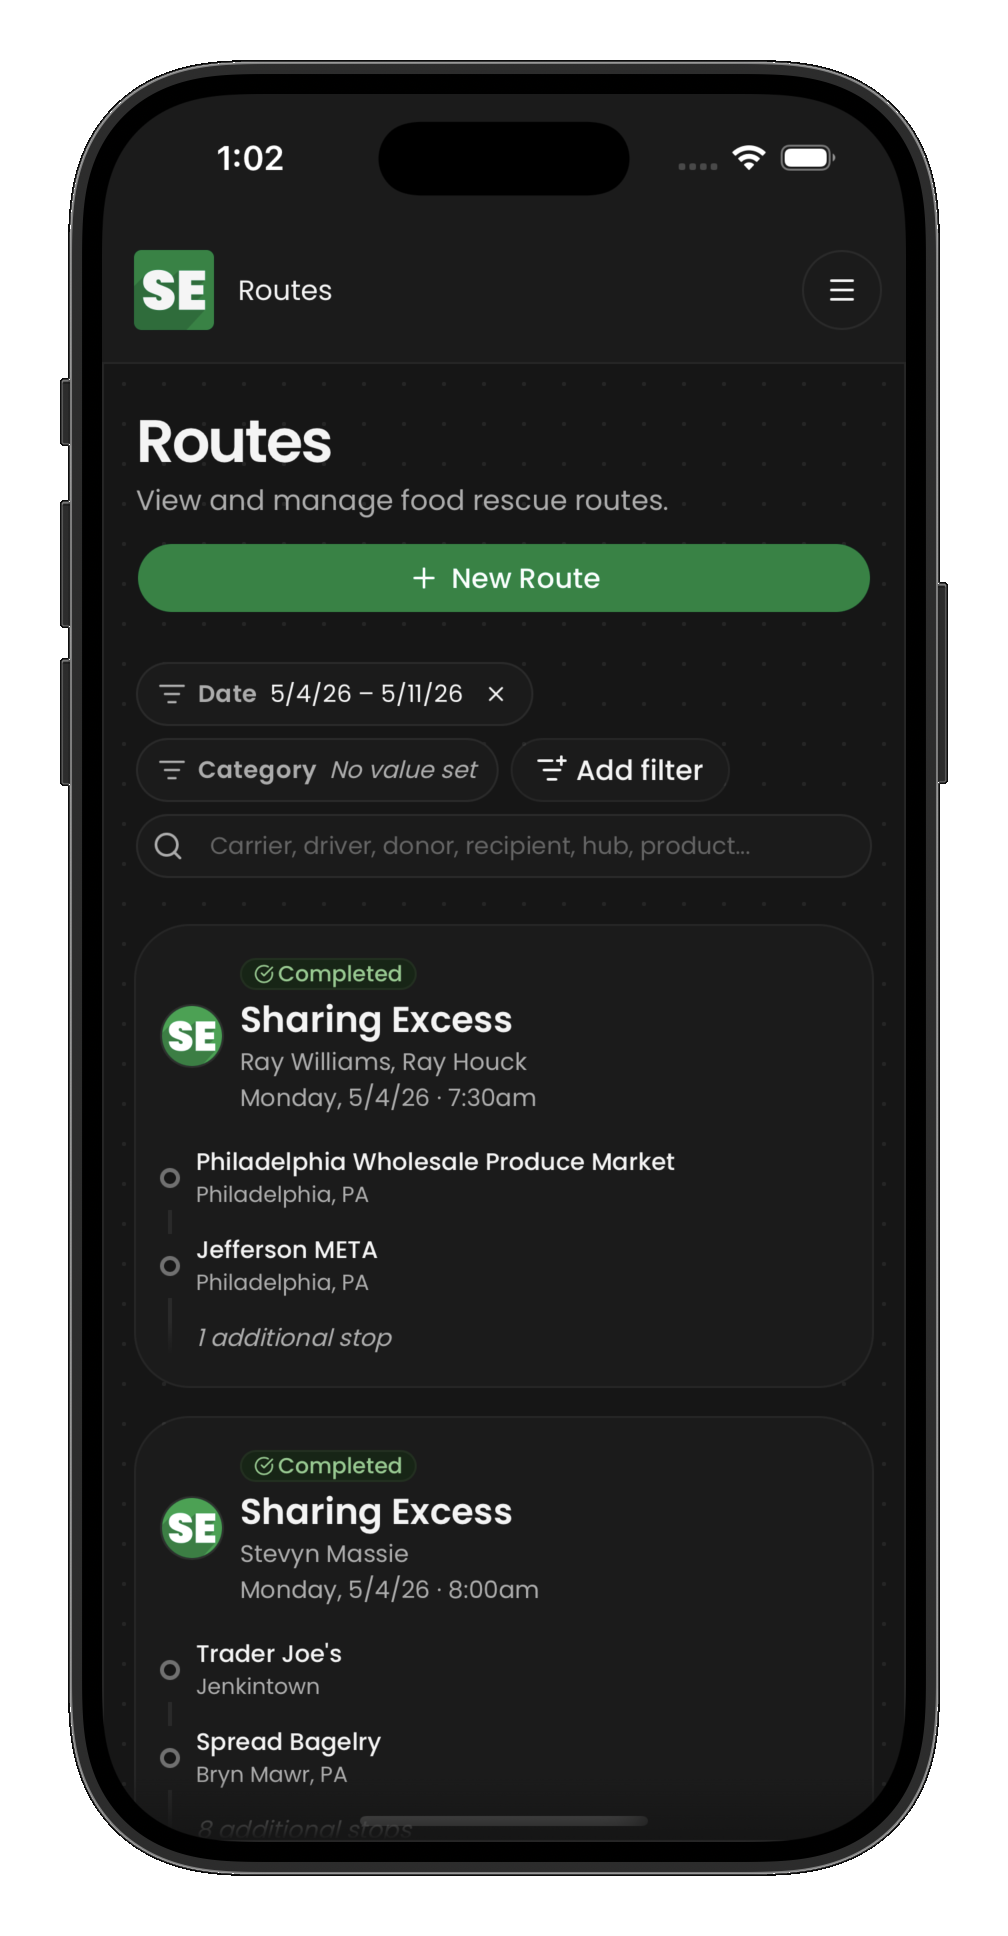
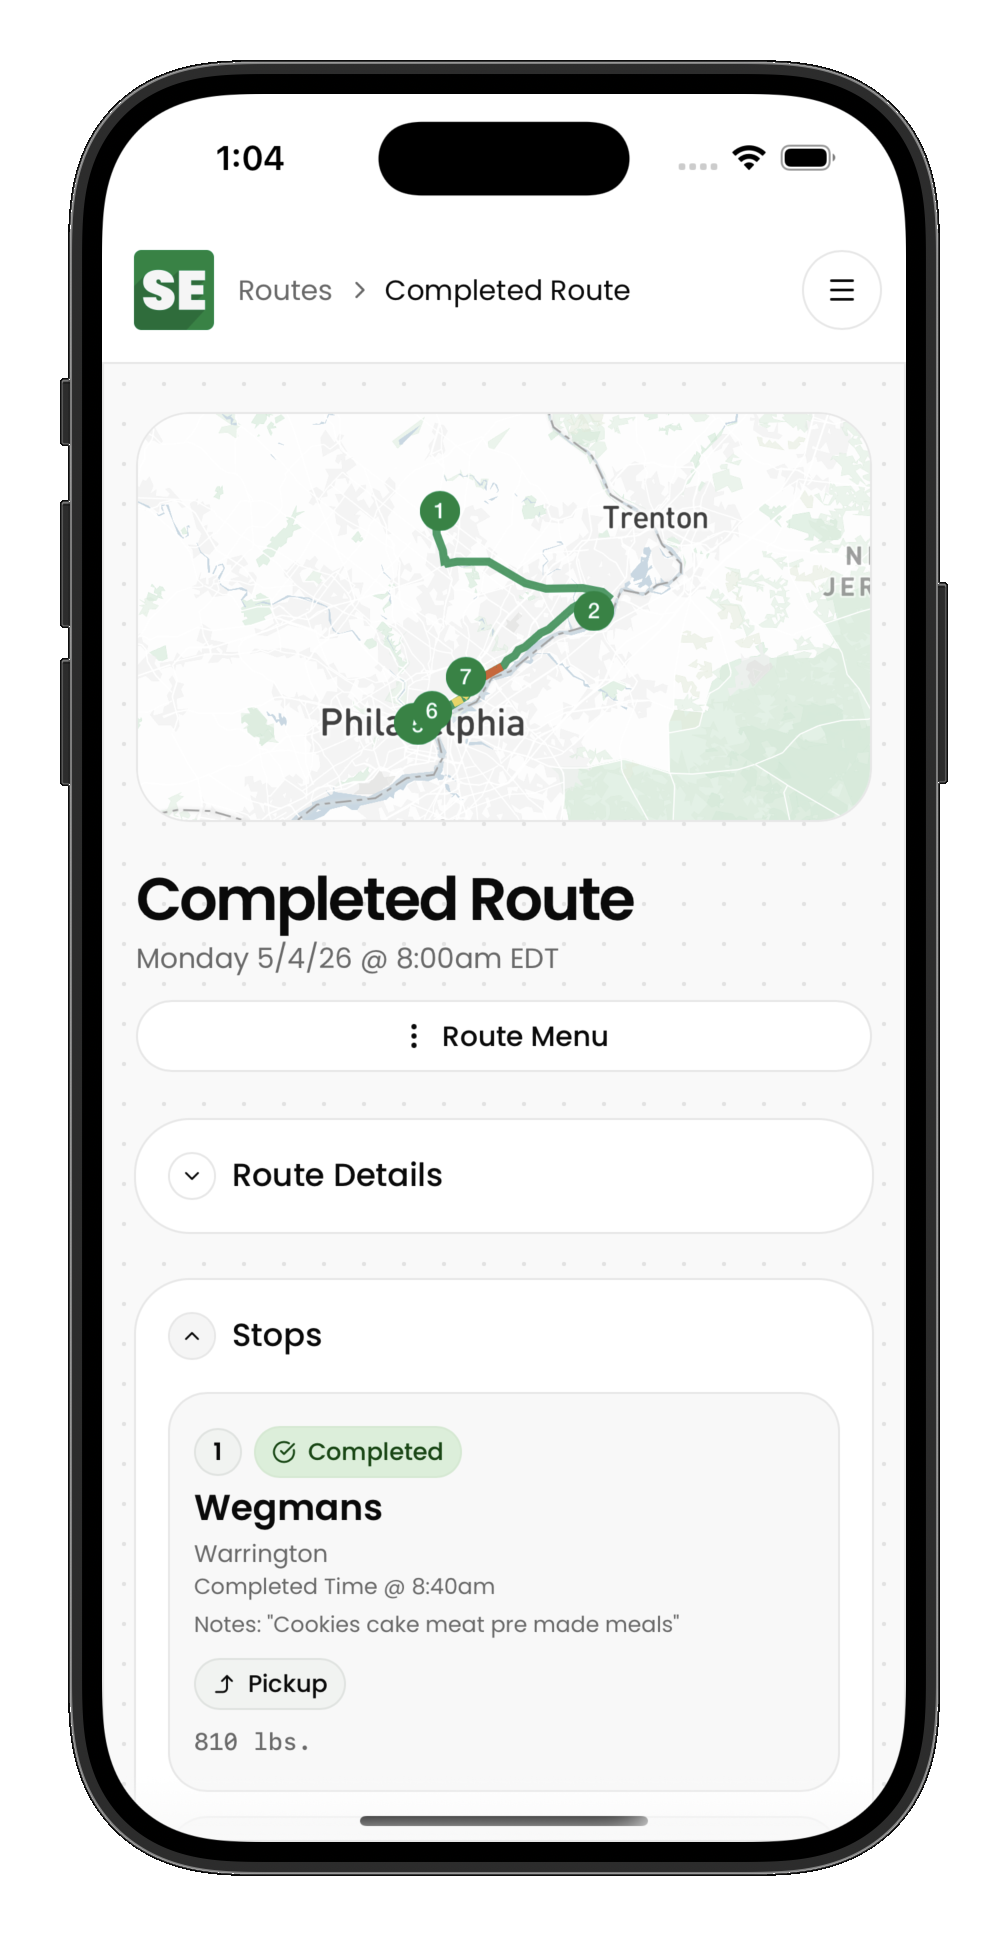
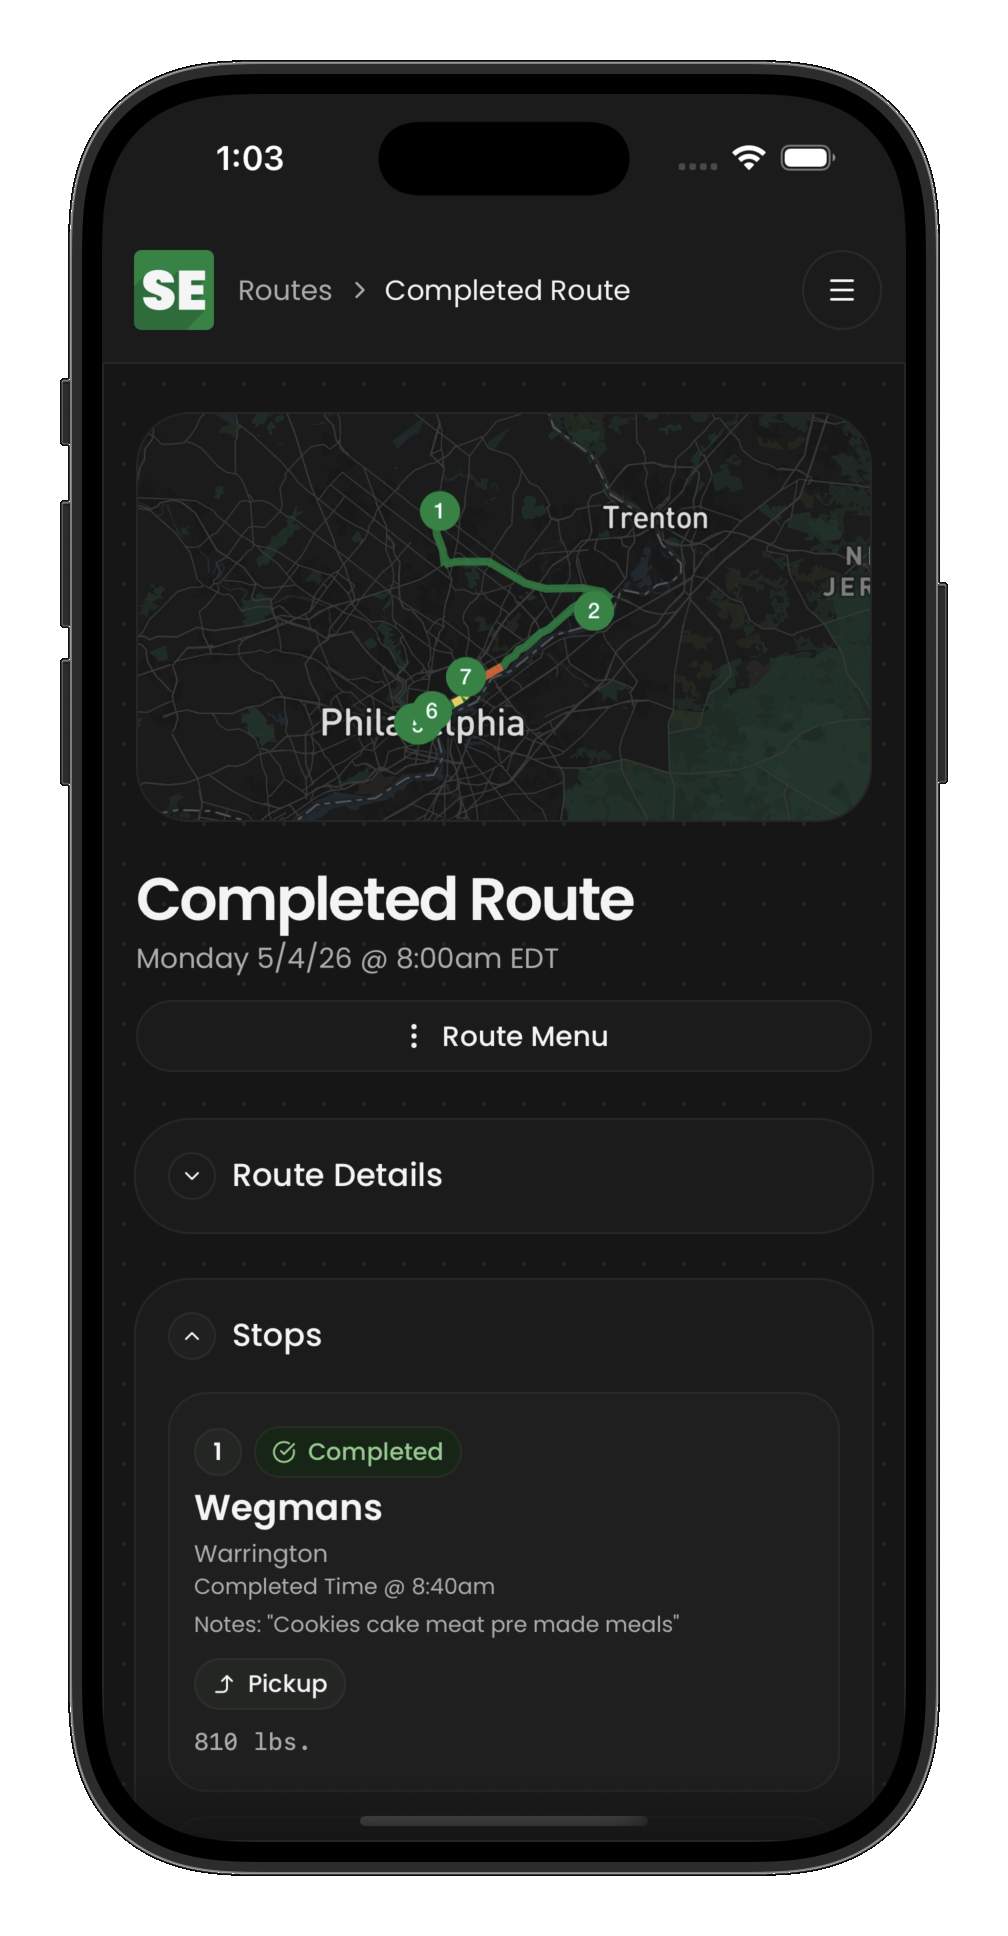
Step 1: Find your route
Open the Routes section to see routes assigned to you. Each route shows:
- The date and scheduled time
- Number of stops
- Current status (scheduled, active, or completed)
Tap a route to see its full details and stop list.
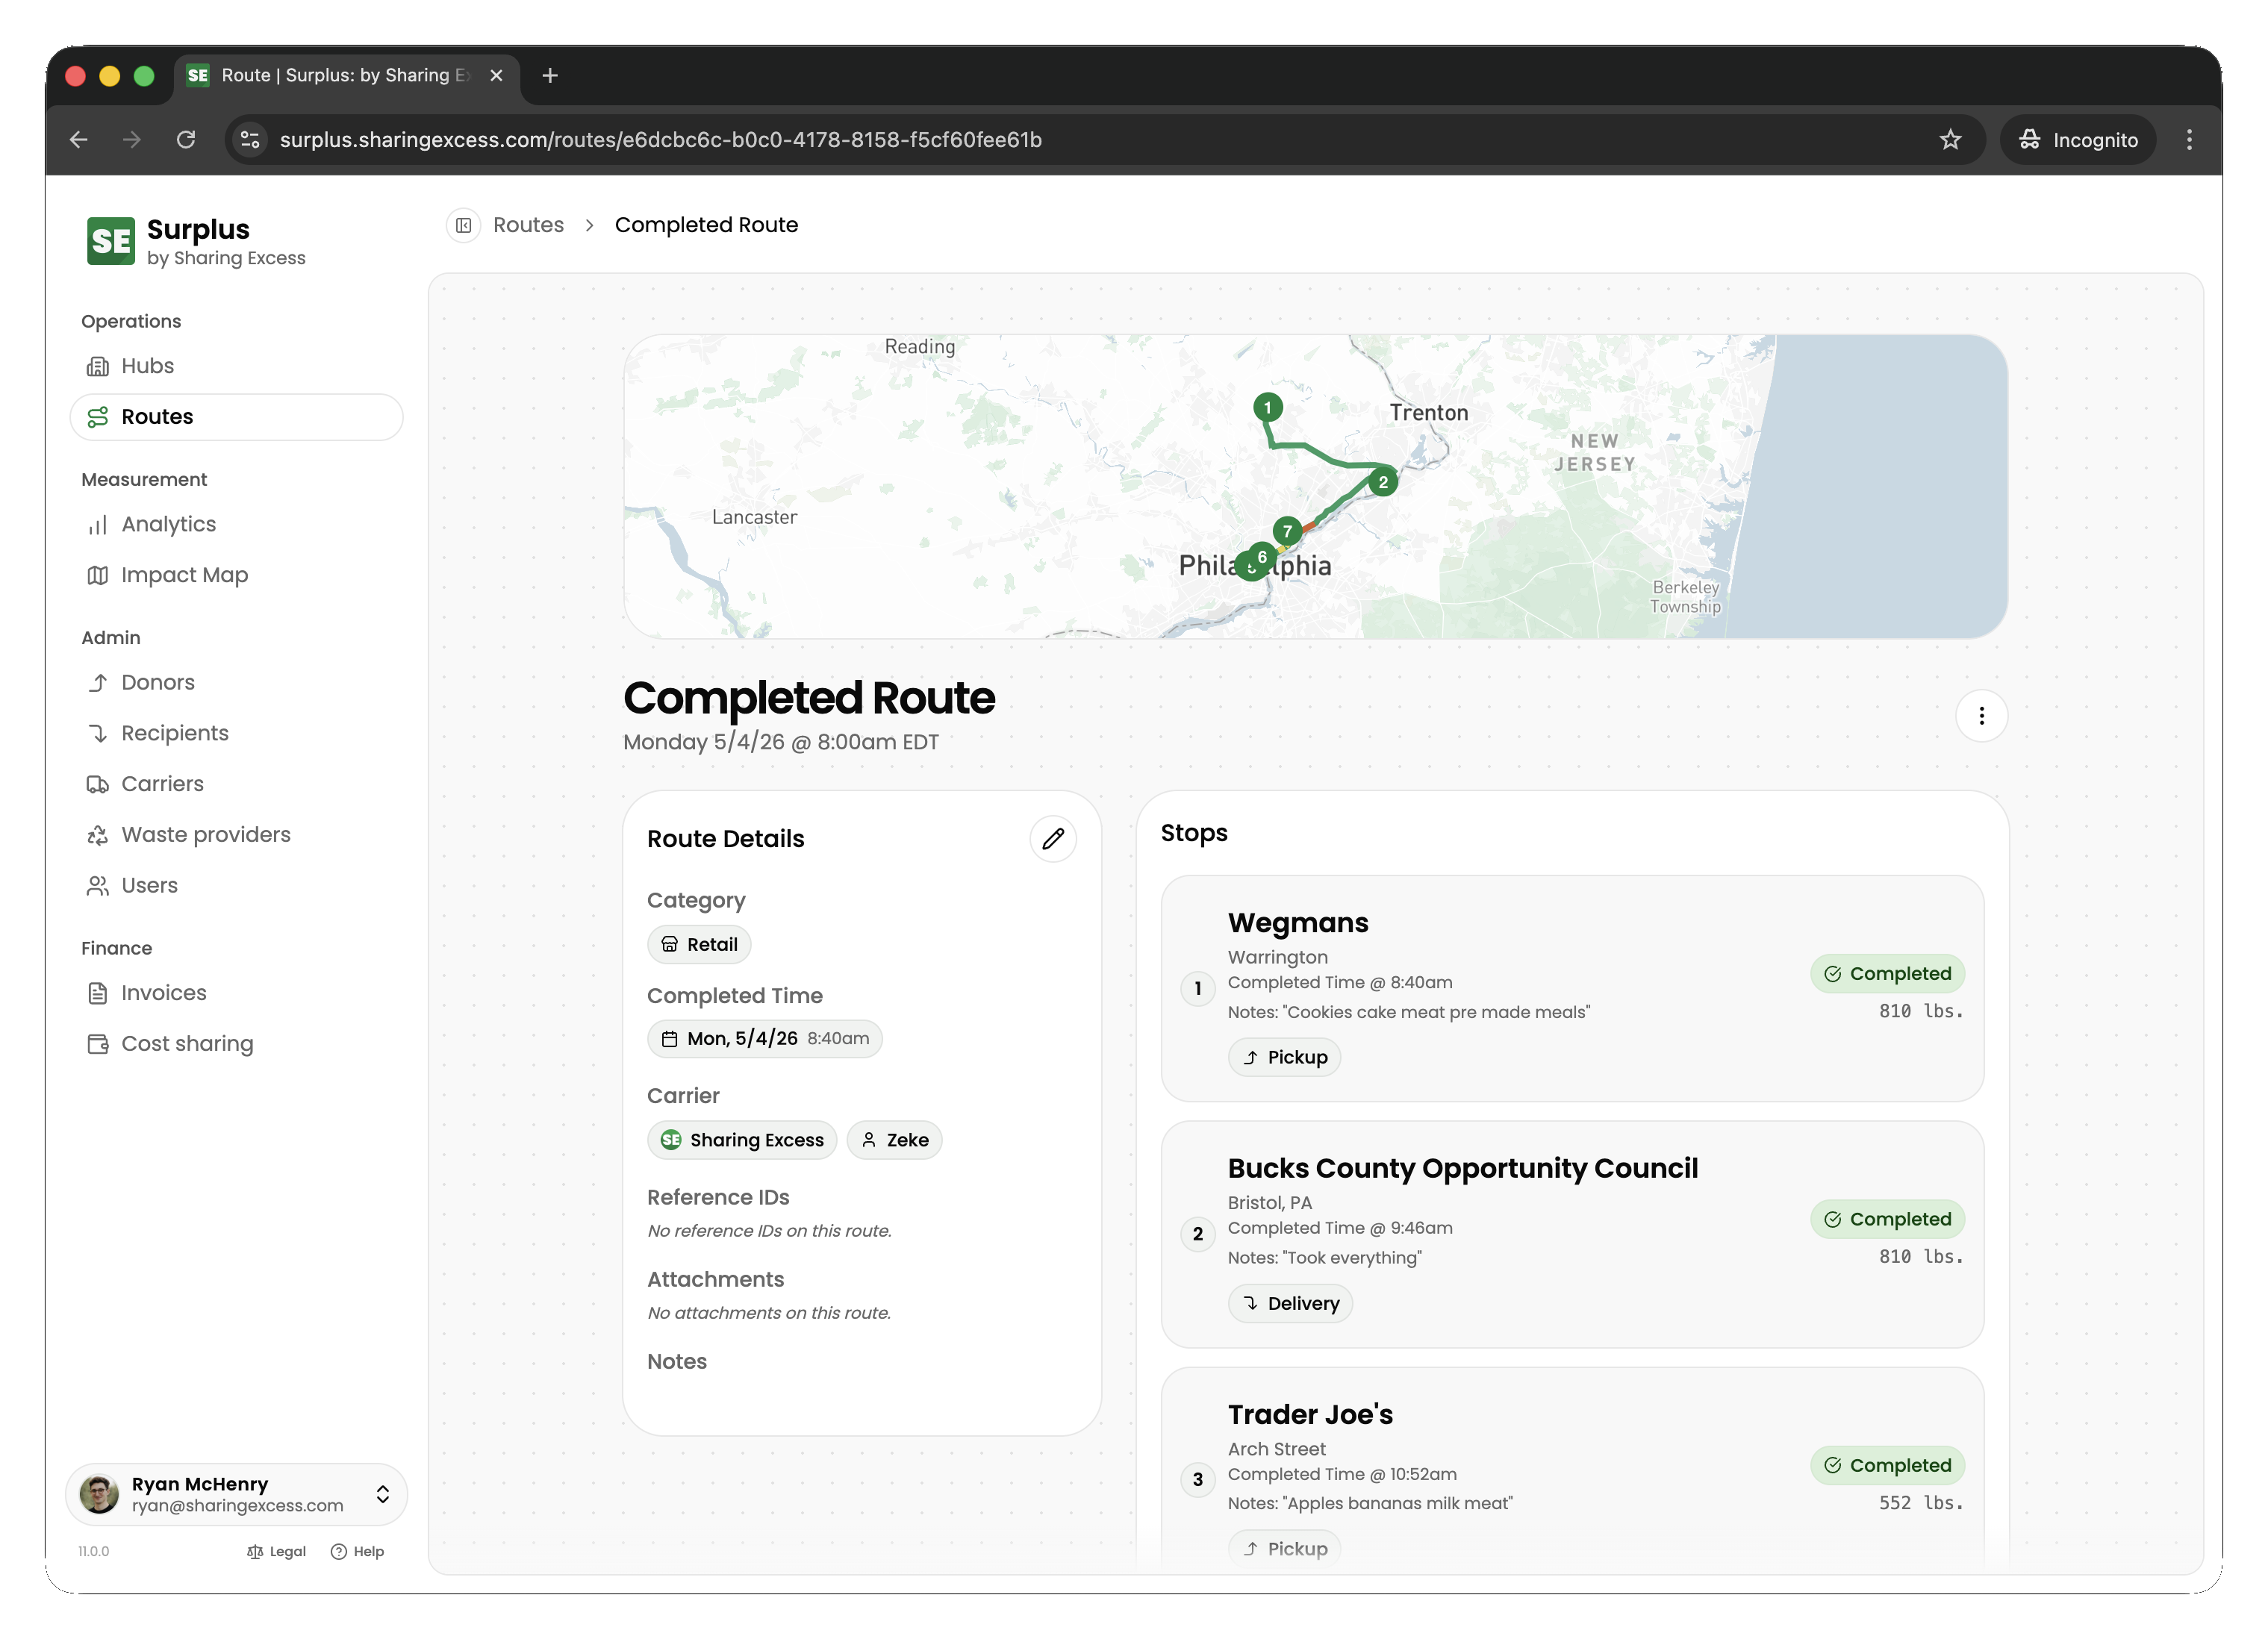
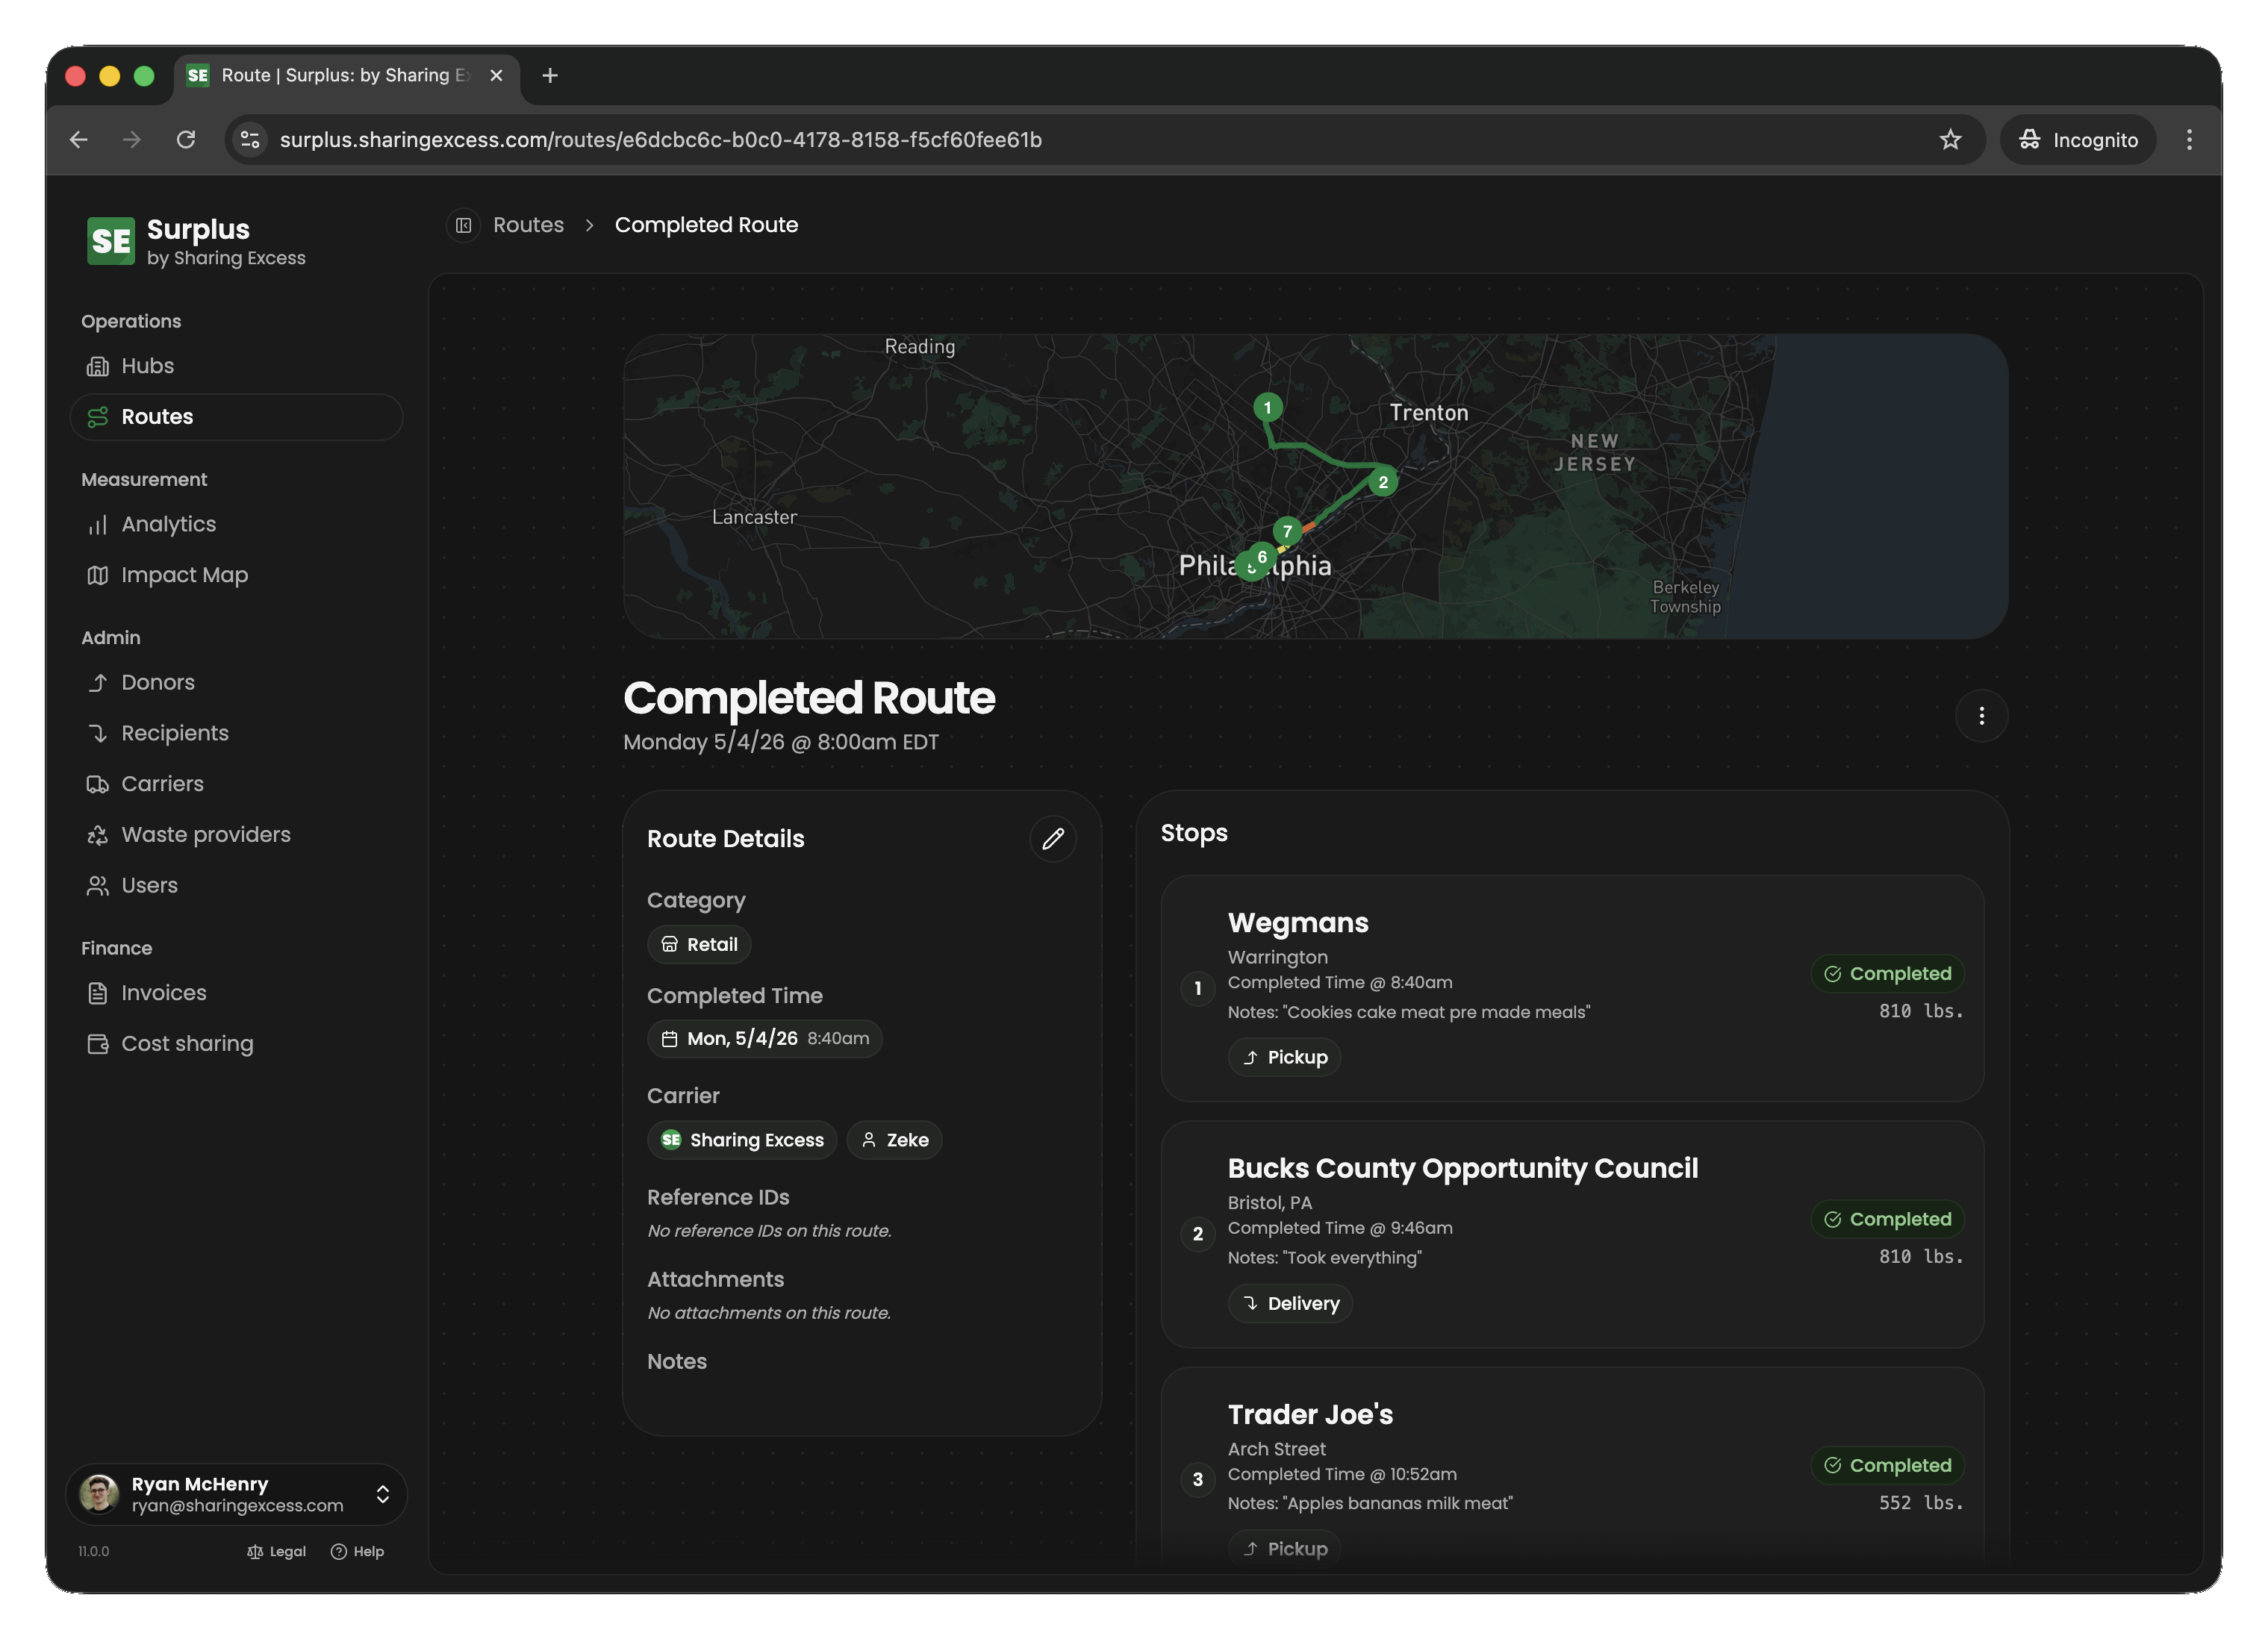
Step 2: Review route details
The route detail screen shows all stops in order, with:
- Stop type (pickup, delivery, load, unload)
- Location name and address
- Any special instructions
Review the stops before starting so you know the plan for the day.
Step 3: Activate the route
When you're ready to begin, activate the route. This changes its status from scheduled to active and signals to coordinators that you're on the road.
Step 4: Complete stops in sequence
Work through stops in the order shown. For each stop:
- Navigate to the location
- Perform the required action (pickup, delivery, load, or unload)
- Enter any required data (see Pickups and deliveries for details)
- Mark the stop as complete
You cannot skip ahead — earlier stops must be completed (or cancelled by a coordinator) before you can complete later ones.
Step 5: Finish the route
Once all stops are complete and your vehicle is empty, mark the route as finished. This:
- Changes the route status to
completed - Updates your personal impact metrics
- Notifies coordinators that the route is done
Tips
- If a donor has nothing to give, your coordinator may cancel that stop — you can then proceed to the next one
- If you encounter issues (wrong address, closed location, food safety concern), contact your coordinator before improvising
- Take breaks safely — the app remembers your progress if you close it mid-route